Monitoring the complex geometrics of the car body exterior in early development stages can raise the quality and avoid misalignment. Nextsense’s Calipri range is helping to fill the gaps
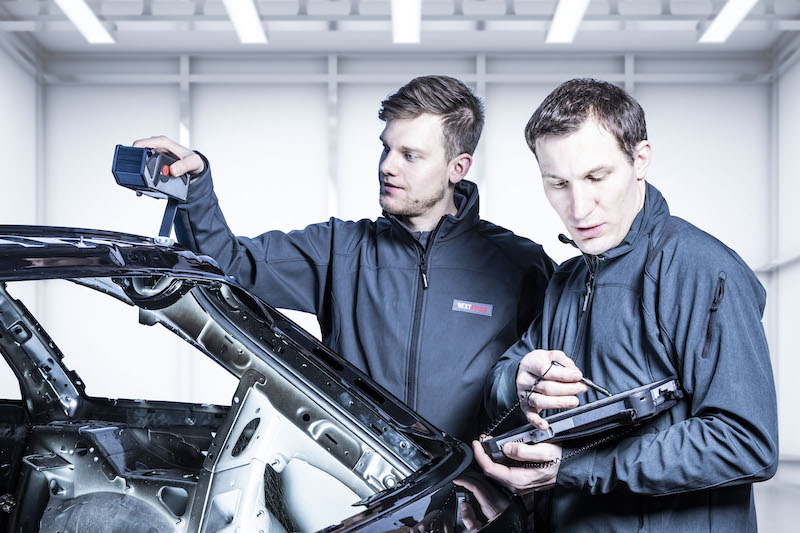 Whether it’s a small car or a luxury model, aesthetics strongly influence purchasing decisions. Exact uniform body gaps and zero tolerance for door misalignment are two typical features of high-quality vehicles. It is important for automobile manufacturers to influence the perceived quality positively. Manufacturers and suppliers use optical gap measuring devices for quality assurance, and also increasingly in early development phases. With Calipri C14, Nextsense offers a wireless hand-held measuring device for gap and flush inspection based on laser light section technology.
Flexible evaluation methods and the traceability of measurement data to CAD target contours, among other things, enable automobile manufacturers to identify sources of systematic errors even in prototyping or pre-series production.
Symmetry in vehicles stands for high-quality workmanship and at the same time increases the perceived quality on the customer side. The perception can be influenced by narrow gaps and smooth flushes. In order to guarantee these quality features, automobile manufacturers are required to invest in high-precision measuring equipment and to control the production process in a targeted manner. Due to their increased accuracy, many OEMs and tier one suppliers use optical measuring instruments to check the radius and contour of individual parts, and to evaluate the gap and flush in assembly. In contradiction to feeler gauges or templates, these optical measuring devices enable an even more precise analysis of the joining process. Due to complex manufacturing and high quality standards, the planners of production processes face many challenges when selecting suitable measuring equipment.
Cross-process technology
For each phase of vehicle development, different criteria are important when choosing a suitable measuring device. Next to 100% testing in series production, measuring equipment in prototype construction or pre-production must guarantee a high degree of flexibility. The use of different technologies makes it difficult to derive meaningful actions for process optimisation. Due to the measurement uncertainty to be considered, results of individual measuring devices must be correlated, eg, whereby this effort increases exponentially the more different measuring systems are used and compared.
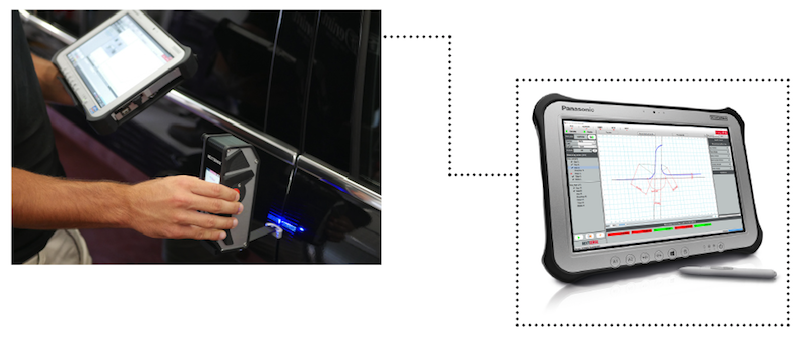
With its Calipri product range, the Austrian metrology specialists Nextsense offers a technology that can be used across various development and production phases. Whether as a hand-held measuring device in prototyping, as an inline solution in body-in-white, or as a fully automated robot system in final assembly, the Calipri technology offers a measuring solution with cross-platform evaluation methods for every process step. Recently, the company released its Calipri C14, a new wireless handheld measuring device for sampling inspection.
Holistic quality controls
If gap and flush measuring instruments are already used in the early phases of automobile development, high quality improvements can be achieved with very little effort or extra cost. Systematic errors and quality problems can be identified early by inspection of the joining process and thus can be avoided in series production.
The primary goal should be to use adequate measuring equipment to monitor the production holistically and to derive opportunities for improvement for earlier manufacturing steps. This is the only way to ensure that changes can still be made cost-efficient before a new car model goes into series production.
If the quality of the assembly is already ensured in prototype construction, fewer optimisation steps are necessary in pre-series production in order to produce a consistently high quality in series production. Thus high-precision measuring devices for gap and flush evaluation significantly reduce the reworking efforts of a new vehicle model from SOP (start of production) even before series production.
For example, up to 300 measuring points are measured in prototype construction in order to optimise the quality of pre-series production. The Meisterbock, a massive construction on which the individual parts are assembled to form a high-precision body, is used in order to evaluate a final comparison of the underlying design graphics with the actual components. The gap contours, which are often hard to see, require measuring instruments with increased accuracy and complete profile recording without any extrapolation. These real contours provide a well-founded basis for definition of process optimisation measures. With flexible evaluation algorithms and the possibility of comparison with CAD contours, Calipri C14 offers a development tool especially for early phases of vehicle development.
Real data
The Calipri principle used is an evolution of laser light section technology with the special feature of an automatic roll and pitch correction, which, according to the manufacturer, offers user-independent measurement results. The wireless Calipri C14 system is guided over the gap by hand in a swivelling motion, whereby the entire profile of the gap is recorded into depth. Even gap contours that are difficult to see can thus be evaluated completely and realistically. Calipri uses several laser lines for orientation during the measuring movement and compensates for inaccurate guidance of the user by employing software algorithms. This method makes mathematical approximation methods obsolete, but at the same time increases the absolute accuracy of the measurement results.
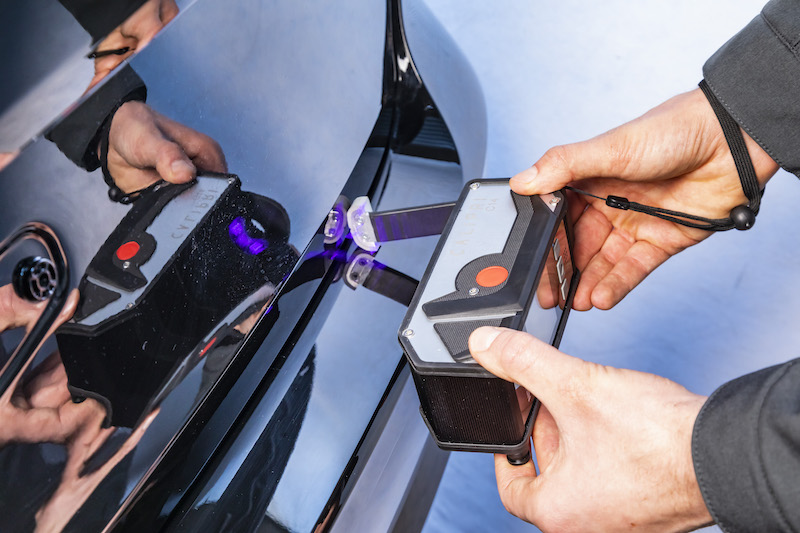 Calipri C14 a wireless hand-held measuring device for gap and flush inspection based on laser light section technology
Securely connected
Following the measuring process, the results are displayed as measurement values (eg radius, angle, gap and flush) on the one hand, and as a profile line on the other hand. In addition, a direct result classification is carried out on the basis of predefined tolerance ranges, whereby deviations from target values are highlighted in colour according to a traffic light system. Thus, exceeded values can be analysed in real time and, if required, sent as a report to the related process steps. Flexible export formats (eg xml, csv, dxf) are available for direct data transfer to databases and process control systems. The digital transmission of test reports avoids error-prone manual protocols, which are required when feeler gauges or templates are used.
The digital data can be used immediately to monitor and control the entire manufacturing process, enabling trend analysis and presentation in the form of meaningful dashboards. In addition, process optimisations on the basis of the measurement results and detailed analyses of the gap geometry can be carried out. This is particularly useful in the early phases of automobile development such as in prototype construction, during production ramp-up or in the case of component changes, for example after a change of a supplier. With these diverse connectivity features, the Calipri C14 enables cooperative data exchange between individual cross-departmental interfaces and ensures safe and fast work.


