The latest quality inspection system scans manufactured products 10 times faster than traditional measuring machines, while also offering more information for accurate analysis
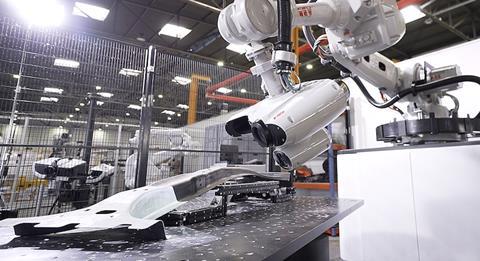
The automotive industry operates in a constantly evolving environment that is governed by increasingly stringent regulations, shifting mobility trends and a growing demand for more customised vehicles. Automakers are adapting to these changes by building a complex network of production solutions that are both complex, involving many ancillary facilities across the world; and flexible, so as to quickly respond to new demands and challenges. This complexity in manufacturing has increased the need for automakers to find new ways to rein in costs and achieve consistency through precise engineering and rapid quality inspection.
The rationale is simple. The ability to manufacture consistently high-quality products has a direct bearing on everything from the costs incurred during manufacturing to the time taken for a company to successfully bring its product to the market. In order to achieve this, ABB has developed a robotic 3D vision and metrology system 3DQI, which is the latest quality inspection solution that provides fast, automated and accurate metrology testing to dramatically speed up production and help manufacturers build more efficient processes, reduce costly rework and lessen scrappage.
The system
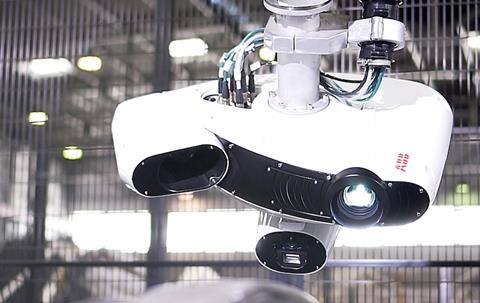
The 3DQI – 3D Quality Inspection – system is an integrated solution that combines an industrial robot mounted with ABB’s 3D optical scanner that inspects quality based on geometrical measurements.
“The system is capable of detecting defects less than half the width of a human hair, and those that are imperceptible to the naked eye. This eliminates the need for time consuming manual inspections, while also significantly reducing the likelihood of faults and errors,” said Toni Roda, ABB’s Global Product Manager for Vision.
The 3DQI system can be used on both off-line and in-line testing stations and uses a single 3D camera, which eliminates the possibility of views overlapping while reducing hardware failures. The system is immune to vibrations and variations in ambient conditions due to its photogrammetric self-compensation and can detect anomalies at 20 microns. Adjustable light power provides accurate results regardless of light conditions, while the system can also differentiate between shiny and black surfaces without the need for spray.
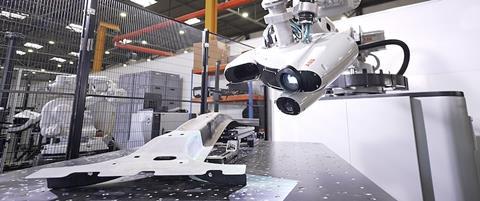
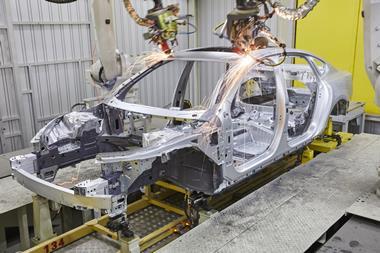
ABB also offers a complete 3D robot inspection cell made up of a robot and a rotating table on which the manufactured part is placed, either manually or with the help of another robot. The scanning robot and the table move in a coordinated manner for the robot to capture images from multiple angles in real-time. The contact-less inspection enables the same system to inspect everything from the fuel tank to the fender skirt and even completely assembled car bodies. All that needs to be changed is for the robot to adjust the reach of its arm.
How it works
The 3DQI system uses structured light technology and the principles of photogrammetry to capture images of the manufactured product. The optoprojector is fitted on the robotic arm, which moves around the product projecting light to capture images from multiple angles, while the optical scanner scans the product and generates, a detailed, virtual three-dimensional model of the part for inspection in real-time.
The movement of the robot’s arm is automatically programmed on Sidio planner, a plug-in on ABB’s offline programming software, RobotStudio. ABB has simplified robot programming by enabling operators to easily instruct the robot on what points of the part that need to be checked. The system calculates the best path for the robot’s arm and executes the movement.
>> ABB online magazine: Digital robotics solutions for the automotive industry
Once the 3D model is projected on the screen, the software compares it to a master file and automatically highlights areas where the manufactured part deviates from the master file beyond the threshold set by the operator. The 3D model of the part can be rotated completely for the operator to check for anomalies, allowing manufacturers to take corrective measures without having to disrupt the entire production line. Operators can conduct a series of analysis, for example, test the position and diameter of holes on an automotive part or even define the acceptable levels of spatter on welded parts.
The benefits: Speed
The 3DQI robot quality inspection system offers a host of advantages over previously use machine and manual inspection methods, of which speed of inspection is a game changer. Traditionally, automotive manufacturers use coordinated-measuring machines (CMM), fitted on a linear axis. The CMMs work by touching the manufactured part at multiple points to generate a digital 3D model. This contact-based measuring technique not only takes nearly eight hours to completely inspect the part, but also offers only a limited number of inspection points.
On the other hand, the 3DQI system which projects light patterns and captures images, does not come into contact with the manufactured part, allowing it to complete the inspection within 3-4 minutes. Moreover, the 3D optical scanner is able to capture about 5 million points for inspection, nearly 2 million more than traditional CMM systems. The ability to speed up quality inspection using more information allows companies to avoid unnecessary and costly scrappage and rework of parts.
The high-speed inspection allows companies to conduct quality control on many more parts than traditional CMM systems. So in the case of a faulty part, instead of scrapping the entire batch due to the lack of time for further inspection, operators can quickly conduct more checks and reduce the rate of scrappage.
Easy automation
Unlike traditional metrology processes that are housed in laboratories or built on linear axis at a dedicated spot of the factory floor, the 3D robot quality inspection system by ABB is a modular solution that can be installed in the production area or where quality analysis needs to take place. This reduces the logistics needed to move parts around the factory floor and also cuts down on costs related to building a lab premises.
All the programming of the robot can be done offline on RobotStudio and sent to the single logic controller that controls the entire robot inspection setup. This enables the system to work automatically, with minimal or no human intervention for a task that is arduous and repetitive. This feature not only saves time, but also frees up human operators to perform more rewarding work. A touch screen provides an intuitive interface for operations, while employees need only two days of training to handle and control the full operation of the unit.
The future of quality inspection
The use of the 3D optical scanner automatically digitalises the quality inspection and opens new avenues to further improve the process. The 3DQI system provides comprehensive data recording capabilities, where information is processed in real time using multiprocessor technology. This gives operators quick access to vital records for future auditing purposes.
“We are now testing the ability for the robot inspection system to harness machine learning and artificial intelligence capabilities to improve the quality, performance and speed of inspection automatically,” said Roda. “This will pave way for us to develop quality inspection for different applications beyond the realm of the automotive industry”.








No comments yet