With shorter lead times and constant cost pressures, OEMs are adopting CT scanning to analyse internal structures without the disassembling of countless prototypes
 Today’s automotive OEMs and suppliers face ever shortening lead times for introducing new products at a lower cost. Consequently, fewer prototype iterations are required and destructive testing is no longer wanted. Tactile probing and laser scanning is well suited to external inspections, but CT scanning makes analysing internal structure and dimensions just as straightforward. No need for disassembly or destruction of expensive prototypes and other materials, CT introduces faster problem solving and more effective decision making with micron-level accuracy and high-resolution images.

To guarantee absolute confidence in component quality, CT is the ‘go-to’ tool for quality assurance labs around the world. The infinitely flexible technology is used for first article inspection, troubleshooting or as a wholly automated inspection system, providing the foundations on which the quality control process can be built. From castings, impellers and composites, to plastics, electronics and additive manufactured (AM) parts, CT provides the inside insight.
The most important element of industrial CT systems is the X-ray source that radiates the beam through the object. Depending on the source type, the spot size can be as tiny as a few microns. The energy of the X-ray beam is important for penetration of high density materials such as castings.
To generate a 3D CT volume, a series of sequential 2D X-ray images are captured as the object is rotated through 360°. These images are then reconstructed to generate a 3D volumetric representation of the object. In addition to the outer surfaces, the reconstructed volume contains all dimensional information of interior surfaces and structure – as well as information regarding the material structure.
It is possible to navigate through the CT volume at any given point, through any plane. As a result, even interior measurements can be easily obtained, as well as the added benefit of localising structural material imperfections and identifying assembly errors, not usually visible through traditional methods of NDT.
Limitless applications in the automotive industryCT scanning provides the most comprehensive insight into automotive components – from plastic to metal parts, electronics to MEMS, and assemblies to weld joints, Nikon Metrology has an option for all requirements.
For engines in automotive vehicles, the efficiency of fuel injectors is crucial to ensure optimum performance. As shown right, the barely visible fuel injector nozzle holes are incredibly small, with tolerances below 10 microns. This means there are limited options for inspecting or measuring such components, however CT proves to be a critical tool for guaranteeing product conformance. It provides both the ideal measurement and inspection solution, able to accurately determine the diameter of the nozzles as well as detect any debris or blockages which could cause underperformance.Interior controls and safety components such as indicator storks and HVAC switches are another example.
Consisting of plastic moulded structures with electronic components inside, CT is able to verify structural integrity and alignment of the housing as well as internal electronic connections. With one scan, the 3D volumetric model can be manipulated endlessly to obtain the information required, all without damaging, dissecting or even touching the component. With CT capability, quality departments are able to see the full picture to gain absolute confidence in components and products, vital for customer satisfaction and adhering to strict quality control procedures.
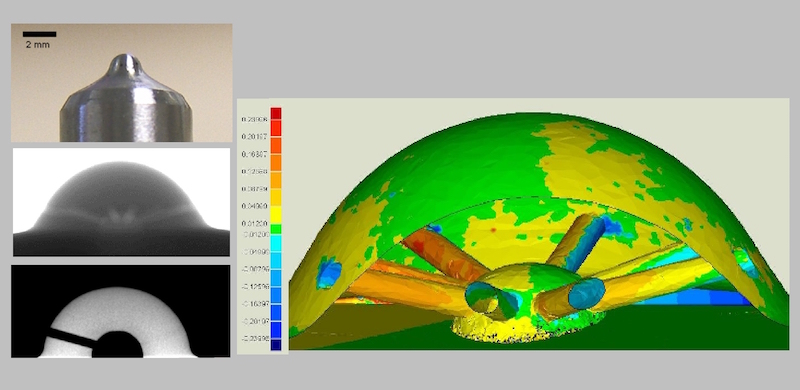 CT inspection of diesel injector nozzle with comparsion to CAD
✓ Non-destructive analysis preserves (expensive) samples✓ Fastest insight into part and assemblies✓ Micron-level CT of plastics, composites & metals✓ Structural analysis, assembly evaluation and metrology CT
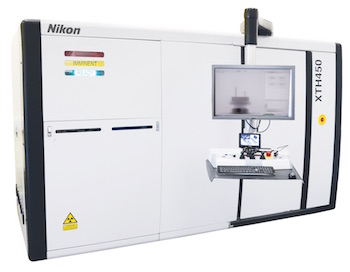
The high-powered 450 kV microfocus sources are unique to the Nikon Metrology range of CT systems and excel in the visualisation of high-density components. Nikon Metrology has developed a proprietary Curved Linear Detector (CLDA) that optimises the collection of X-rays travelling through the part, without capturing the undesired scattered X-rays.
By avoiding image pollution and associated contrast reduction, the CLDA realises stunning image sharpness and contrast. A 450kV source combination with a dual detector (ie, flat panel imager for fast cone beam CT and linear detector for scatter-free fan beam CT) is ideal for CT inspection of metal alloy parts. Such a system offers sufficient energy to penetrate through the part and generate a scatter-free CT volume.
CT of additive manufactured componentsAs additive manufacturing continues to make waves throughout manufacturing industries, a viable and trustworthy inspection method is required. With the recent trends, metal additive manufacturing is implemented more frequently for critical operation parts. such as impellers. CT is a reliable solution for implementing accurate non-destructive inspection of the complex internal structures. Beside geometrical inspection, CT is also able to detect any blockages, defects and voids in the complex geometry to ensure optimal functioning and integrity of components.


