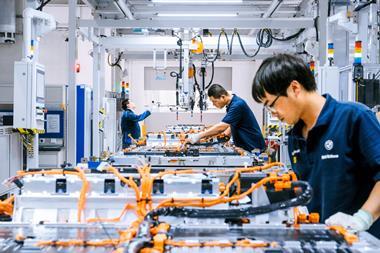
Vision systems can help maintain and improve quality standards across most areas of car production, while also driving new technology designed to increase automation and reduce production costs.
Such systems are predominantly used in the following areas: part inspection (including measurement); assembly verification; flaw detection; and part identification (using 2D data matrix codes, laser etching and similar techniques).
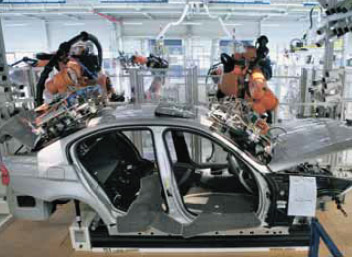 Yet back in 1999, according to figures gathered by the Automated Imaging Association, the automotive sector accounted for only 6% of the total vision market. But while this was small compared to usage in the electronics industry, the anticipated market share held by carmakers was forecast to grow considerably over the coming years.
The prediction proved to be accurate. Only 12 months later, the AIA reported a 35% increase in the global sale of machine vision equipment, translating to $5.9 billion in sales. Even then, according to the association, this covered only 10% of the applications that could benefit from the technology.
Dave Dechow, President of Insight Integration, a Michigan-based vision systems integrator owned by German firm ISRA Vision, commented at the time: “The auto industry, certainly in North America, believes that machine vision is an acceptable and proper way to achieve quality assurance.”
By 2000, the switch from proprietary software packages driving vision systems to those based on PC and Windows-based platforms was well underway.
“There was a time, a few years ago, when PC-type devices were not acceptable in an automotive manufacturing environment,” said Dechow at the time. “Now the industry has fully-embraced PCs and Windows as the standard.”
One of the first companies to make this switch was Perceptron, the Michigan-based developer of in-line measurement solutions, which released its IPNet solution. This incorporated digital sensors using a Windows NT-based internet communications technology – perhaps the first case where vision data was freely distributable and accessible to all authorized company personnel.
Audi was the first OEM to purchase the new product, installing a limited version of the system at its Ingolstadt, Germany plant. A further upgrade for the Audi A3 model included 26 IPNet measurement cells with a total of 600 sensors.
Later it was the turn of Volkswagen, which elected to install the system across multiple plants. In the US, both GM and Chrysler chose the IPNet solution. At the other end of the scale, low-cost sensing solutions were becoming more widely available, with some single-camera systems costing as little as $5,000.
While these could be positioned at key points along the production line, rather than just at the end, and were described as being relatively simple to install and use (some didn’t even require a PC hook up), experts warned that such systems required some expertise in set up to achieve reliable, repeatable results.
“Selling people boxes and letting them get on with it often doesn’t work,” said Peter Bhagat, Managing Director of Gardasoft Vision, a UK-based supplier of turnkey vision systems.
“They (then) think machine vision technology doesn’t work and are reluctant to give it a second try.”
Another option still in its infancy at the turn of the century was mounting cameras on robots, making a manoeuvrable, non-fixed vision solution.
With the obvious advantage of being able to view multiple areas and variable parts with a single camera, one of the first carmakers to use this was BMW at its Spartanburg, South Carolina facility.
Once the system had been informed of the vehicle entering the measurement station, the equipment automatically cycled through a series of pre-determined checks.
Predictions for the future of vision technology at that time included the development of hybrid measurement systems combining fixed and robot-mounted cameras.
Interestingly it was the ‘boxed’ solutions, which showed carmakers what could be achieved in measurement, that showed the way forward.
Early installations had grouped cameras and sensors at the end of the body-in-white production process, measuring spacing and gaps in one go. While this was adequate for final measurement, tracing defects back to source proved virtually impossible due to the lack of staggered production analysis.
Later systems took the route of placing sensors and cameras at key positions in the production line for so-called ‘distributed measurement’, with the data immediately collated and available for line managers to trace and resolve problems.
In fact traceability was to become a major selling point of future vision systems. The reading of markings and identification codes was a priority in tracking supplier-delivered parts and their potential defects – particularly in safety-critical areas.
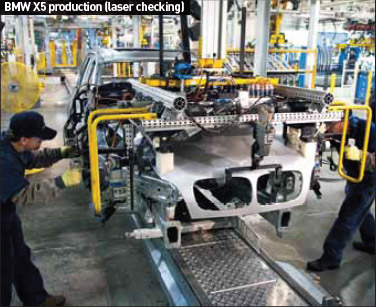 While OEMs were checking quality across final production, their suppliers were using vision systems to maintain delivered part quality. Philip Heil, Chief Technology Officer at DVT, said at the time: “Even one bad part that slips through to the OEM is an extremely costly incident for a supplier.”
The need to reduce production costs was also driving vision uptake. Added Heil: “Every year, the OEMs go to their suppliers and ask for price cuts, though, of course, they want the same quality. This is driving the suppliers to use more automation and build more intelligence into their manufacturing systems, including vision.”
As a case in point, Visteon installed DVT SmartImage sensors to inspect more than 1,000 headlamps per shift.
Developed by systems integrator NewPlus Technologies, the checks were carried out at three stations using four DVT sensors, NET backlighting and fibre optic specular lighting. Checks included the verification of the alignment and penetration of two screws and the presence of the required gasket, waterjet and washers, while identifying each unit.
With two inspectors, the checks had previously taken 30 seconds each; that was reduced to 5.5 seconds using the new system. While lasers are widely used in metrology solutions, Oxford Sensor Technology developed a vision system employing LEDs for windscreen mounting at Ford’s Dagenham, UK plant, specifically intended to overcome a problem related to the reflectivity of freshly-painted car bodies.
Known as the Specular Reflective Sensor, the equipment was mounted on the frame of the robot gripper, using pre-defined features on the car body to calculate correct placement and distance. The LED-based system was unaffected by paint colour, whereas lasers had often returned poor-quality images due to the various colours of the car bodies.
Where lasers have made successful inroads over the last decade is in measurement, correctly aligning parts and checking that the installation has been properly carried out. An example is the smart laser sensors used at Audi’s Ingolstadt plant on the A3 production line.
Fitted in 2004 by Omron, the system was designed to monitor cockpit pre-assembly, including 3D robot correction and adhesive bead monitoring, before the final installation was checked using a Z550 laser profile sensor.
The latter was attached to a robotic arm, measuring pre-defined points on the back cockpit mounting plate to check for accurate mounting.
While it is now commonplace to use vision and laser systems attached to robotic arms to check fit and finish, the technique has been taken one step further. Systems ensuring parts are correctly oriented when delivered to the production line are now commonplace.
At TRW Automotive’s plant in Woodstock, Ontario, heavy brake rotors weighing 35lbs (20kg) each are lifted from casting bins before being sorted to the correct machining centre. Incorporated in the setup is a depth-finding laser, adding the Z-axis element to the vision system’s own X and Y fields, effectively allowing the system to fully understand the initial orientation of the part before it is picked by a magnetic end effector.
In fact, when looking at vision systems as a whole over the last decade, what stands out is the expanding number of areas in which the technology has found a home.
Reading part codes and laser etchings proved only to be the first in the list of applications in which such technology could be employed, a situation greatly enhanced by the reduction in size of the physical units used to collect data.
From windscreen installations and the associated adhesive bead inspection, the range of use today covers the inspection of gaps, welds and adhesive joins in BIW, through to analyzing paint colour and checking for shade and finish quality.
The last 10 years has seen vision equipment appear in virtually every area of automotive production. It’s likely the next 10 years will see an even greater increase in the use of the technology, with further automation and reduced unit size.


