Correlation-free measurements are set to fundamentally and permanently alter in-line measuring technology and ultimately the world of manufacturing
 This global innovation not only enables automotive manufacturers to make measuring and production more efficient, but also brings them significantly closer to the smart factory of tomorrow. “Correlation-free measurements will provide an entirely new foundation for in-line measuring technology and boost manufacturing efficiency,“ says Dr. Kai-Udo Modrich, head of Carl Zeiss Automated Inspection. To give you a better understanding of how automotive manufacturers benefit from using this technology, we decided to have a quick look at the world of in-line metrology solutions.
Dimensional accuracy – the be all and end allAutomotive manufacturers throughout the world monitor production using in-line measuring systems to meet their own high quality standards. These systems detect geometric deviations from defined characteristics and provide 100% inspection in the production cycle, enabling manufacturers to drastically reduce start up times, especially during product ramp-up.
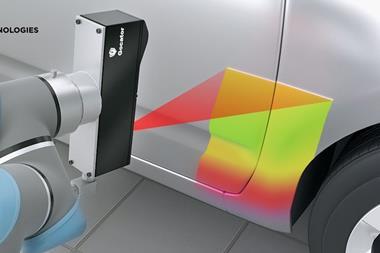
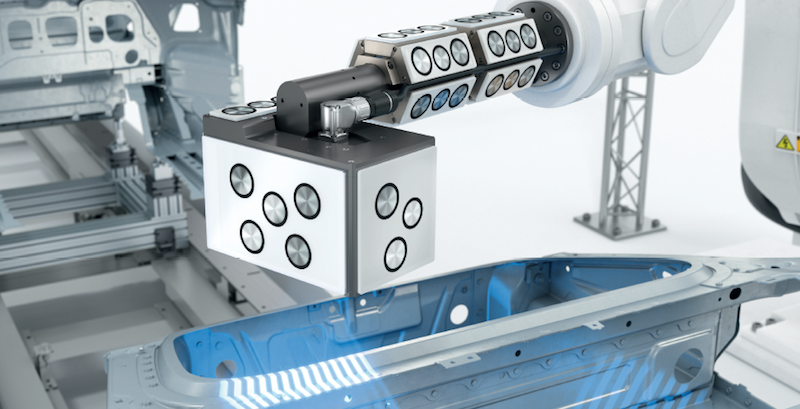
The speed and precision at which the geometry characteristics are inspected depend primarily on the optical sensors used. Last year, Zeiss demonstrated the AIMax cloud sensor to car body experts at Automatica. This 3D sensor uses fringe projection to generate a point cloud in just a fraction of a second. In addition to the geometry characteristics which are already known, the new sensor design makes it possible to quickly and precisely capture characteristics which used to be difficult or even impossible to measure, such as rivets. By obtaining thick point clouds, multiple characteristics can be measured immediately with just one capture thanks to Zeiss AIMax cloud. Moreover, even extremely small characteristics can be measured precisely and on very different surfaces.

As is typical with all in-line systems, a flexible robot arm moves this outstanding sensor to the corresponding characteristics on the individual car body components. This method ensures that the entire measuring system provides accurate results, and no subsequent measurements are necessary. With traditional in-line measuring systems, reference measurements are performed on artifacts to ensure reliable repeat accuracy. Active compensation is necessary for the robot arm extension because of self-heating and changing ambient temperatures. As robot measurements typically have minimal absolute precision, the determined measurement values are usually offset by performing a comparison measurement on CMM.The correlation is then checked using multiple measurements.
Modrich sees the additional CMM workload in the measuring lab as a problem. Reliability starting with the very first part Zeiss developed correlation-free measuring to ensure that component dimensions are measured reliably, beginning with the very first part. This system uses standard cameras to detect the robots’ deviation from their specified position, which can be caused by the aforementioned temperature influences. These cameras are installed above the in-line cell and track every movement of the Zeiss AIMax cloud sensor without any difficulty.
There are markers on the robot arms and on the base of the in-line cell so that the system can determine the absolute position of the sensors in the space. Thanks to this information and, most importantly, intelligent algorithms, the software developed by Zeiss detects deviations from the standard state and immediately filters these out.
With this system, companies must no longer subsequently measure their car body components on a highly precise CMM at regular intervals, and then transfer the identified discrepancies between the in-line and CMM measurements to the in-line measuring systems as correction values.
“Now manufacturers can be sure that the measured values are correct, beginning with the very first part,“ says Modrich. “Having spoken with many different customers, I know that car makers have been eagerly awaiting this development, because the benefits are obvious: companies significantly expedite the ramp-up times for manufacturing new models and achieve the desired move rate more quickly. And that means real savings. “For this Smart Production expert, this is only the most obvious benefit. Since the system already delivers reliable data beginning with the first part, it lays the foundation for implementing a closed production loop between the in-line measuring station and, for example, the welding robot.
The software developers are still working on incorporating the know-how employees have acquired from years of experience, but for Modrich this is only a matter of time: “The day will come when the in-line measurement data will directly control the manufacturing machines.”
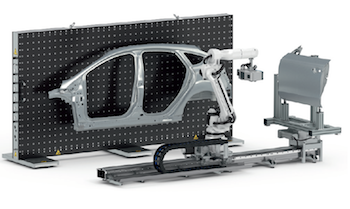 AIBox flex is a complete modular system with options for measuring larger components, such as a complete side panels
At-line measuring goes modularIdentifying and fixing defects as quickly as possible in car body production requires hat numerous characteristics be inspected in-line. The Zeiss AIBox bridges the gap between performing inspections that do not disrupt production and the highly precise measurements in the measuring lab. With the AIBox flex, Zeiss is putting an enhanced version of the AIBox on the market. The new digitalisation system offers car makers a wide range of options and increases the throughput rates of scanned workpieces.
Quality assurance in car body construction is more essential for preventing expensive recalls. Consequently, there is great interest in metrology solutions that can be performed at-line and even in-line. In-line inspection during the production cycle is becoming increasingly important – 100% inspection integrated into production is already in use in car body construction. To prevent defects before they occur, inspection data are evaluated in real-time and constantly visualised as trends in data sequences. In-line monitoring requires relatively high precision and image resolution from the measuring and inspection technology under manufacturing conditions – and this must all happen at a speed suitable for the production line.
Zeiss AIBox flex, an enhanced version of the AIBox launched last year. This digitalisation box makes it possible to perform a complete optical scan of attachments near the production line while still measuring them with great precision. Thanks to its modular structure, users can significantly modify the Zeiss AIBox flex. For example, they can choose how the loading systems are inserted into the box. They can also determine the number and size of the available measuring positions in the Zeiss AIBox flex. Many OEMs want to be able to scan side panels near the production line, which Zeiss accommodates by putting the measuring robot on a rail. “With the implementation of the seventh axis, we have given the robot translational movement capabilities,“ says Modrich.
This change significantly increases the used capacity of the sensors and consequently the throughput of the scanned parts. For example, while the system performs a scan at the first measuring position, the system is already being loaded at the second measuring position. The robot then travels immediately to the second measuring position after scanning he attachment at the first one.


