Powerful and user-friendly vision systems are making this technology increasingly popular for assembly line tasks. AMS assesses the benefits of the latest technology
While vision equipment is not considered emerging technology, until recently the systems have necessitated a reasonably high level of programming expertise and technical skill that has restricted applications to large projects involving qualified systems integrators.
Nowadays vision systems are not only more powerful, they offer greater ease of use at a more comfortable level of investment. Thanks to progress in several related technologies, such as computer interfaces and microprocessors, machine vision has evolved into a highly capable and flexible tool that in-house teams can integrate with confidence while improving productivity and quality in the manufacturing process.
Vision technology applications in the automotive sector typically involve robotics, assembly verification, flaw detection, print verification and/or code reading. Examples on the production line range from engines, powertrains and brakes, to electronic controls and vehicle interiors. Experience shows that one of the most important considerations for automotive applications is potential variation in the parts or sub-assemblies, including colour, texture, shape, size, material and orientation, as well as the presence of oil or cleaning solvent. Specific common problems are geometry detection in automotive bodies and body panels, assembly control and monitoring, contour and position monitoring of stamped parts and pressed panels, as well as detection of colours and colour markings on automotive bodies and component parts.
 Colour verification
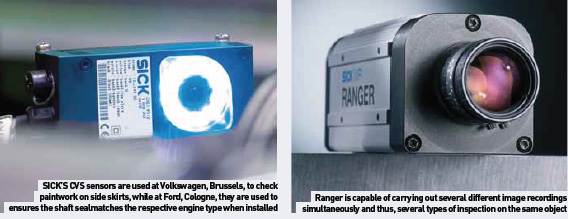
According to sensor and vision specialist, SICK, what is essential for the selection of a suitable vision solution is the complexity of the testing assignment, as well as the general conditions resulting from the test items and the operating environment. A frequent field of application relates to verifying the colours of a surface or marking, and here SICK promotes CVS production series sensors. For example, at Volkswagen in Brussels, Belgium, such a system is used to check paintwork on side skirts. Another application comes into play at Ford in Cologne, Germany where a CVS colour vision sensor ensures that the shaft seal matches the respective engine type when installed, and is subsequently marked with the corresponding colour.
Also in use at Ford Cologne are SICK’s IVC-2D ‘smart’ cameras. These read the CARIN (car identification number) on the automotive body of the Ford Fiesta. Meanwhile, in final assembly, the cameras detect whether a robot inserts the correct variant of windshield – with heating elements or without.
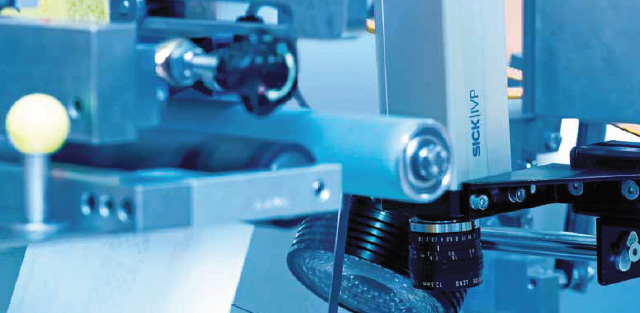
Inspection tasks involving spatial criteria, but also those hampered by poor contrasts, are increasingly solved with IVC-3D using its 3D laser triangulation technology. The IVC-3D, featuring integrated laser optics, projects a line onto the object at a defined angle and records it with the camera function. The result is a height profile. By means of object movement relative to the camera, the individual 3D profile becomes a spatial image of the tested feature, which is evaluated directly in the camera. The inspection of tyres is one application that underscores the performance of the system. While tyres are manufactured, the camera monitors the joining of the individual rubber layers for gap, width and overlap. With the finished product, the camera detects tread pattern, measures tread depth, reads out type designations and finds any damage on the tread and/or sidewall. The poor contrast of tyre rubber, which causes many 2D cameras to fail, poses no problem for the IVC-3D.
If high resolution and rapid image processing is in demand, the answer is SICK’s Ranger camera system, which delivers up to 35,000 profiles per second, with more than 1,500 3D data units recorded for each profile. Featuring a multi-scan function, Ranger is capable of carrying out several different image recordings simultaneously and thus, several types of inspection on the same object: grey scale images for 2D measurement, 3D height profiles, and a scatter image containing data about the object’s surface. One of the current examples of use is the monitoring of laser welding seams, which involves reliable detection of holes, marginal nicks, surface pores, gaping cracks or other indications of flaws.
 This application is also being targeted by Servo-Robot, which promotes the use of its 3D laser vision technology for the improvement of joining processes using laser seam tracking, laser seam searching and weld inspection. Its latest innovation is LAS-SCAN LBJ – an advanced inspection system for laser brazing processes. Because of the high-quality braze joint required on exposed car body components, Servo-Robot has developed an inspection system that specifically deals with the very small dimensions of the pinholes to be detected in comparison with the large dimensions of a car body, the inaccuracy of its position and the complexity of programming the robot holding the optical measuring device.
To overcome these issues, Servo-Robot has combined two high-speed digital imaging sensors that work together in one compact laser camera unit. This 3D dual-sensor technology optimises the performance of the 3D laser camera and avoids misinterpretation of defects (false positives) common to standard greyscale 2D imaging technology.
False positives occur with greyscale imaging techniques because they can be fooled by braze joint colour nuances, black spots, variable surface roughness and shininess. Servo-Robot technology is more industrially reliable because it can detect the depth of the pinholes down to 0.1mm rather than only the coloured spots that appear on the surface of the seam.
Traceability focus
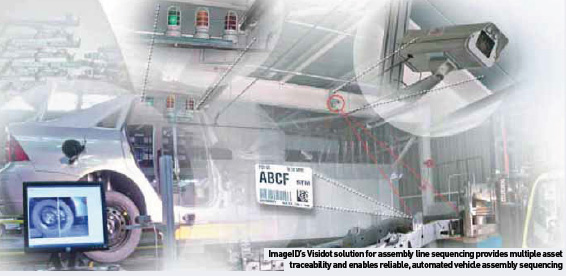
One major application for vision systems in the automotive sector is traceability and regulation compliance, an issue that ImageID has tackled head-on with its Visidot solution for assembly line sequencing. This is a rapid, imaging-based AIDC (automatic identification and data capture) solution that provides multiple asset traceability and enables reliable, automated vehicle assembly sequencing.
It is capable of accurately capturing multiple tagged automobile components or assemblies in a matter of seconds, even while in motion, offering interfaces to back-end ERP systems and real-time, web-based management and reporting. Visidot reader gates, deployed at chassis and other vehicle component points of entry, capture barcode (1D), Data Matrix (2D) or ImageID ColorCode tags affixed to incoming sub-assemblies, and verify insertion of the proper components into the production process in the right order. Assembly verification using vision technology is also a core competence at Cognex, as Nissan’s Sunderland plant in the UK can verify. Here, Cognex In-Sight cameras are being deployed to overcome difficulties with the plant’s existing mechanical centraliser, which could not cope with the new glass sizes for two of its key vehicles. The centraliser positions at six points around the edge of the glass and locates it to a known ’central’ location in preparation for the next stage of production. Therefore it was imperative that the new vision system would not only provide accurate information for the two new models, but also that it would easily adapt to future product developments. The system was to be supplied for use on the Nissan Micra and Note production lines. The key project requirement was to determine the glazing type on the line, which could be one of four variants. Two In-Sight 5100 cameras are used, with one camera placed in each cell, which is on the side of the assembly line. Each camera is fixed at the required height by a steel stand mounted to the cell base. The In-Sight cameras use Cognex’s PatMax part and feature location software, which uses advanced geometric pattern matching technology to locate parts.
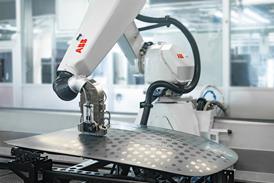
Using a Fanuc six-axis robot with RJ-2 control, the cameras provide the robot with two vital pieces of information. Firstly, a digital signal from the camera is sent to the robot confirming the glass variant. Then, a serial string is sent from camera to robot with the co-ordinates of the glass so that the robot collects the glass in the same position each cycle. The co-ordinates measured are X, Y and the angle of the glass on the vision part of the cell (front to back, side to side and twist).
Pass the glass
The robot locates the glass from the data supplied by the vision system, manipulates the glass edge through a fixed nozzle that applies a continuous bead of mastic to the glass edge and finally transfers the glass to an offload position where an operator applies to the vehicle. Of course glass is not the only automotive material that can prove a challenge for vision systems; as mentioned, tyres are also known for their lack of clarity, a problem for which Oxford Sensor Technology has developed a new solution. “It is vitally important for vehicle manufactures and logistic companies to ensure that the correct type of tyre is fitted to a vehicle and, in the case of vehicles being supplied to the US, that the date of tyre manufacture is also recorded,“ says Anthony Williams, the company’s managing director. “This is usually a manual operation that is both labour intensive and prone to errors.”
The reading of black text on a black background is an extremely difficult application for traditional greyscale camera systems. To overcome this, OST has developed a high-speed 3D laser scanning system that uses a 80mW laser diode to project a line of light (approximately 35mm wide) radially across a section of the tyre side wall. A camera (SICK Ranger) views the laser line from an angle. The laser line is deformed by the surface of the tyre allowing the cross section of the surface to be found. The wheel is rotated in front of the camera system and thousands of images are taken, allowing a 3D model to be constructed. The OST system uses a 1500uSec exposure time and captures 667 frames per second. An image 1400mm long by 35mm wide is captured in 6 seconds. “The model is converted into a greyscale image, where the darkness of each pixel represents its height,” says Williams. “To ensure a high contrast between the characters and the background a band-pass filtering algorithm is used on the image data.”
The system also features an automatic learning facility: if a character is not identified, the operator will be prompted to enter the correct character and the system will automatically learn this for future reference. The system can be easily reconfigured to read either barcodes or matrix codes embossed on the tyre.
Picked and placed
“We have also developed packages to interface directly with pick-and-place robot systems, which will pick a wheel from its transit container, present it to the vision system and place it on to the conveyor,” explains Williams. “Alternatively it can be used with traditional manipulator systems, which centre the wheel, lift it clear of the conveyor and rotate it in front of the camera system.” A common denominator reflecting the success of the latest vision systems in automotive applications is innovative software. A case in point is Scorpion Vision, which has just launched a 3D software add-on from Tordivel as an enhancement to its 2D non-contact industrial vision offering.
Scorpion contains a number of standard machine vision tools to find and measure parts to a high degree of accuracy. Based on this existing toolset, Tordivel has created a 3D tool that creates a mathematical model of the subject using more than one camera. Stereo vision is an immediate benefit, making it possible to demonstrate how two angled cameras can re-sample two images to create a third re-sampled image with a top down view. The company’s customers now have access to 3D vision by just buying the base Scorpion Vision licence and a 3D add-on. According to Scorpion, the system has already been installed on inspection robots at automotive plants in Scandinavia.
A wide range of applications
The list of potential applications for vision systems in the automotive arena is widespread and growing, according to Automation Engineering. “We have a product called CMAT: an automation station that aligns, assembles and tests camera modules,” says Andre By, Chief Technology Officer. “For automotive, these camera modules are used not just for rear view but also for looking forward and to the sides as part of passive or active collision avoidance systems.
“The CMAT station uses the camera sensor itself during manufacturing to perform alignment in five degrees of freedom. This is a machine vision application, but we are using the product itself as the vision sensor. A key feature of these stations is our five-DOF alignment, unique in that most camera modules for automotive are assembled with only a single degree of freedom that limits image quality,” he adds.
Modern vision technology is less expensive, more compact and robust than previous-generation systems. No longer the preserve of large scale projects, vision systems can be applied to virtually all identification and verification tasks at every stage of assembly.


