With the demand for quality specifications from OEMs on the rise Gestamp turned to Zeiss for a new approach to quality assurance
 Deer graze undisturbed in the fields that stretch off into the distance as far as the eye can see. Yet there is a lot more to this corner of the Czech Republic than first meets the eye.
The region’s strategically advantageous location, close to the German border, and the availability of a highly skilled workforce brought the Spanish automotive supplier Gestamp to Louny. “Back in 2011, we saw the creation of one of our most cutting-edge factories out in the countryside, not far from our customers BMW, Audi and VW,” says Ignacio Fernández Landa, senior process control systems and procedures engineer at Gestamp.
A total of 560 employees produce more than ten million car body parts like A and B pillars, cross car beams and bumpers. And there’s more on the way as the range of products coming out of Louny expands.
“This technology presents an enormous opportunity for us to combine car safety with climate protection goals,” says Fernández Landa. Unlike cold stamping, hot stamped parts are significantly sturdier and more stable. And this is all possible even though hot stamped parts are more than 20% lighter than those manufactured using standard methods – a decisive factor for automotive manufacturers who are increasingly legally obligated to reduce their vehicles’ CO2 emissions.
A single step
In Louny, Gestamp manufactures more than 230 different body-in-white parts for 13 OEMs. One reason for this success is the company’s ability to master hot stamping, a particularly tricky process. Sheet metal with different thicknesses made of different materials are reshaped to form a complex component in a single step. This makes it possible for one component to meet different strength requirements and feature both high-tenacity areas as well as a crush-collapsible zone.
Gestamp currently operates 75 hot stamping lines worldwide. At the beginning of every single production line, a robot lifts the unformed metal blank from a pallet and gently places it on a roller conveyor every few seconds. The roller conveyor moves the blank into a feed oven approximately 50 metres long, with an effective length (where the part is being heated) of 36 metres. Here the blanks are heated up to 900° C. At the end of the oven, another robot picks up the glowing red metal and positions it in the forming press, which reshapes the material at about 750°. The metal in the press is cooled down to a temperature ideally below 270°C, based on quality of the form – contact with the part and flow of cooling water. This happens in just a few seconds, creating the martensitic internal structure responsible for the metal’s high hardness value. Due to the material change, it is difficult to use traditional machining tools to drill boreholes into the parts. Thus, laser cells are used in Louny to give these extremely complex components their final shape. A laser beam cuts all the necessary holes with great precision while removing excess material. These 18 cells at Louny are loaded by employees who immediately inspect every 10th to 15th part.A new approachIn addition to the numerous benefits of hot stamping, the process presents one challenge that can affect the manufacturing process. The tool pressure with hot stamping is significantly higher than with cold stamping, which requires new moulds to be created and the old ones to be changed out more frequently. To meet the increasing quality specifications from the OEMs while simultaneously monitoring the manufacturing process even more closely than ever before, Gestamp began to look for a new approach to quality assurance in 2016.
“It became clear to us that we needed to measure more parts to offer our customers an optimum product,” explains Michal Pelc, vision specialist at Gestamp in Louny. Everyone involved agreed that the company’s goal of inspecting 33,500 parts per year would simply not be possible with the existing coordinate measuring machine. Gestamp also wanted to use big data analysts to make important manufacturing decisions. “This meant that we would have to acquire, store and analyse more quality data,” says Fernández Landa. The big challenge was to find a system that could measure the parts more quickly while still remaining accurate.
Raphael Putseys, global key account manager at Zeiss, understood quickly that as an optical system, the Zeiss AIBox would fit in perfectly along the production line. As Putseys and his company see it, Zeiss is a solutions provider. “Thus, an interdisciplinary team and I in Oberkochen developed a comprehensive proposal. We collected different ideas, and then assembled our individual solutions to create a customised system that was a perfect fit,” explains Putseys. The team making the decision at Gestamp were impressed by the solution suggested by Zeiss. After comparing offers from competitors, the company decided to purchase the entire Zeiss package: a Zeiss AIBox with the Zeiss Comet automated optical sensor, Zeiss PiWeb data management software, the Zeiss fixturing system with a feeding solution and multi-week on-site support.
In action
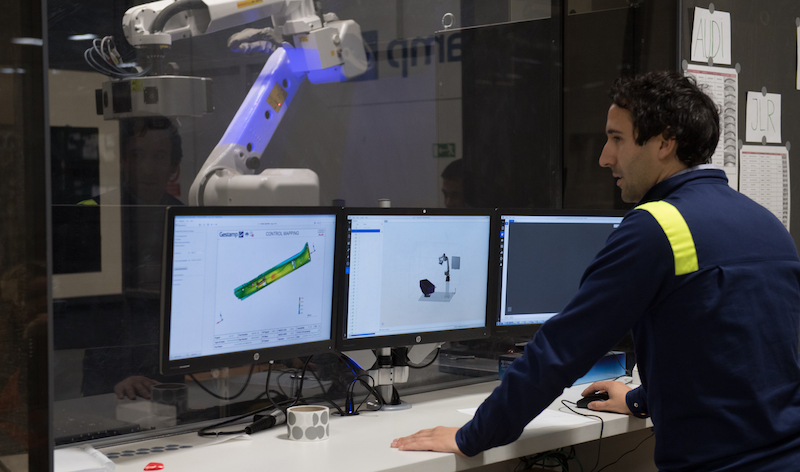
Since the beginning of 2017, the Zeiss AIBox has been in operation at the plant in Louny, checking up to 500 characteristics on a component within 10 to 15 minutes. The Zeiss Comet Automated sensor uses innovative LED illumination and provides the necessary, highly precise measuring results. This allows Gestamp to ensure that it maintains the required tolerance of +/- 0.3 mm for several components. Those parts that are machined with a laser following hot stamping or that have already been welded together or assembled are measured in the Zeiss AIBox. The size of the particular random sample per lot size is determined based on the requirements of the OEMs and the company’s own targets. The goal is to measure 33,500 parts per year with the Zeiss solution. “Without the Zeiss system, we would need at least three contact measuring machines to perform the same tasks,” says Pelc. Although the system has only been in use for several months, Fernández Landa sees the system as a success. “We are really pleased that we have a solution that has met all our expectations. We developed a solution that has significantly sped up loading the Zeiss AIBox and saved space,” says Putseys. Here, Zeiss fixture systems come into play. Thanks to their modular design, customers are able to store all fixturing equipment for the individual parts in a storage unit measuring around five metres in height. Pelc and his colleagues simply remove the appropriate fixturing equipment for the part that needs to be measured and screw this onto the four stationary loading tables only 10 steps away from the cabinet.
The complete package
“Without this loading system, we would have needed to expand the assembly area,” says Fernández Landa. Pelc demonstrates how easy it is to operate. He picks up a hand scanner to capture a barcode on the loading pillars used to automatically run the corresponding measurement program. In order to prevent collisions and faulty measurements, a camera in the Zeiss AIBox captures the workpiece and automatically checks that the component on the measuring table is the right one for the measurement program. “This significantly simplifies handling and completely eliminates any risk of mistakes,” says Pelc. Zeiss were on-site programming the measurement software for 20 different parts inspected in the Zeiss AIBox, leading Gestamp through the process. This enabled Gestamp to start its inspections quickly. They can also generate a large quantity of data with the sensor. This data is then statistically processed using Zeiss PiWeb. “To take one example, we are now able to determine when our pressing tools need to be replaced earlier,” says Fernández Landa. “By offering a complete package comprising the measuring system, software, fixtures, loading system, programming and engineering services, Zeiss was able to impress Gestamp management in Spain as a one-stop shop,” says Putseys. The next step is to implement the Zeiss solution used in Louny at a new production facility in the UK.


