Counting on the data
The implementation of digital tools is transforming the quality control processes in manufacturing operations

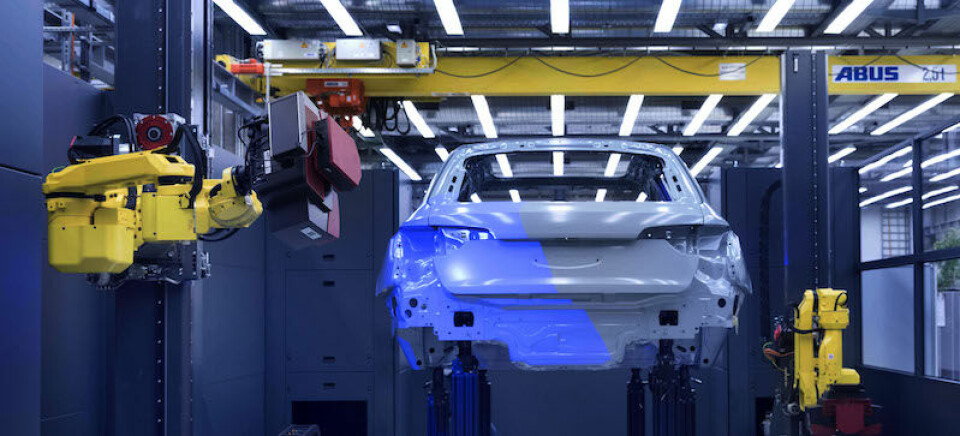
Physical jigs are now being rendered as digital models and Audi says it is well on the way to representing a concept that resides in the digital, ‘virtual’ world. The company is now exploiting the concept of a ‘digital master jig’ at its plant in Ingolstadt, Bavaria – effectively using robotically manipulated optical sensors to gather comprehensive digital data on physical vehicle and component mock-ups to improve quality and compress development timescales.
“We have been implementing digital solutions for years now at Audi, because the values measured via tactile sensors are already digital data,” confirms Marcus Hoffmann, head of master jigs and measurement technologies. “What is new is the ability to acquire data for entire surfaces via optical sensors in a single measurement. This means we are now able to inspect large surfaces even those of an entire vehicle in a very short period of time.” The challenge that follows is that of “handling the large quantities of data,” but the rewards can be considerable because “the data can be accessed worldwide”, he adds.
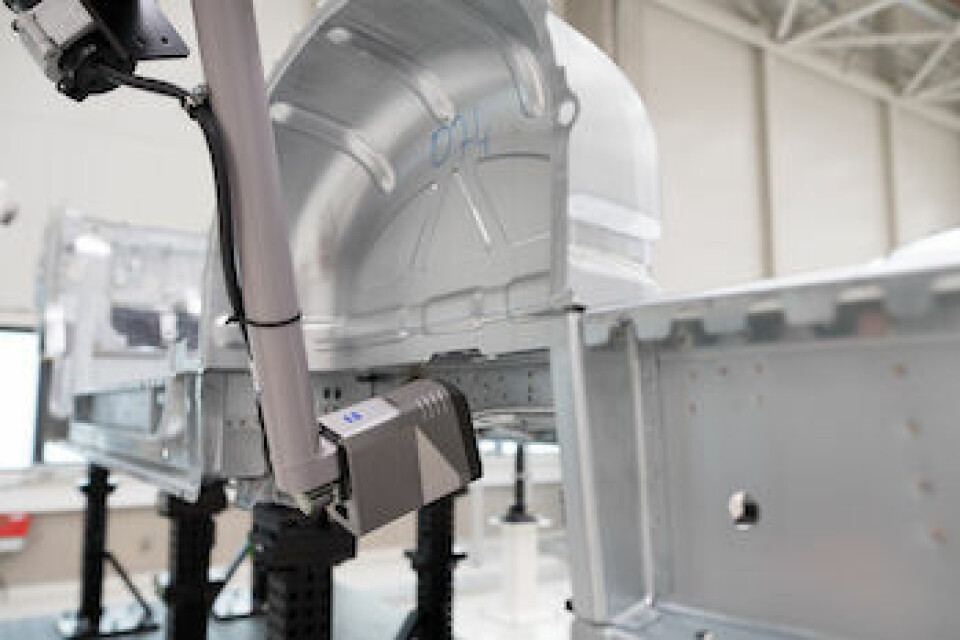
Hoffmann confirms that several cells for both exterior and interior applications are now in use at Ingolstadt, with the most recent having been commissioned in 2017. These involve the creation of a “local zero-reference environment” utilising “exterior function cubes”. Hoffmann says the latter are used to check exterior components for conformance to the design data and “not only let us check a specific part, but also other parts that are in direct contact with them.”
[sam_ad id=17 codes='true']
As Hoffmann explains, components from the series production of a vehicle must correspond to the qualification status of the master jig, but this released status is now saved as a digital reference sample, which eliminates the need to retain physical components. “Digital component data for the entire surface now enables computerised component analysis without having to perform additional measurements with stored reference samples or calibration statuses,” he states.
Solid parts and digital modelsHoffmann also says the approach facilitates development work with both manufactured parts and digital models of components. An example involves the fuel filler flap of the new Audi RS 4 Avant. In an early development phase, the bodywork component was only available as a CAD data record and was merged virtually with the digital measurement data of the manufactured tank. Interactive analysis of the facing surface curves, as well as the outline and radius geometries, then enabled quality assurance staff to identify the need for corrections much faster than previously and well before assembly started. “The matching of digital and real parts is practice-proven at Audi,” he states emphatically.
Use of the techniques for vehicle interiors has followed on from that for exteriors but, Hoffmann says: “The functional interior master jig has already been implemented successfully in the current A8 and A7.” Prior to that, he says, “the existing jig was used to evaluate and optimise geometric variables, such as component fitting as well as all other look-and-feel aspects, such as the surface, tight fit, noise and haptic properties. But now the functional interior master jig enables us to tap into new work areas such as functional adjustments, the analysis of light scattering/leakage and tuning of graphic user interfaces.”
In addition, says Hoffmann, the benefits of the approach also extend to suppliers where operations are simplified and accelerated significantly. “Potential part deviations can be analysed and corrected immediately,” he explains. “They are based on digital reference samples and ensure fast availability as well as international compatibility and interchangeability between Audi sites and suppliers worldwide.” Moreover, even more intensive exploitation of the technique is envisaged. “We are already working on the concept of a virtual master jig,” reports Hoffmann. “The new challenge is how to simulate forces and material effects, but when we achieve that goal we will be able to save on additional physical vehicle mock-ups.”
At the measuring stationsElsewhere, a mix of off-line and in-line optical inspection is proving crucial to quality control at the Volkswagen factory in Wrzesnia, Poland, where the company is currently ramping up to produce as many as 100,000 Crafter and MAN TGE vans per year. The relevant activities take place in a 5,400 sq.m, climate-controlled ‘measuring lab’, where the equipment includes one off-line and five in-line robotic optical measuring stations – a set-up that enables accurate measurement to +/-0.5mm and also the ability to prepare and prove out programs for the in-line installations without interruption to manufacturing operations.
All the stations utilise Zeiss AIMax sensors and the same type of six-axis robot used in the plant for welding operations. Hence a standardisation of both quality control and production equipment is employed to help support a high degree of product variability with VW aiming ultimately to double the current 29 Crafter variants produced at the 2.2m sq.m plant to around 60 base variants.
That point is made by Dr Kai-Udo Modrich, head of car body solutions at Carl Zeiss Industrial Metrology. He confirms that the vehicle parts involved comprise the underbody, left and right sidewalls and both open and closed main body. There is, he states “a 100% measurement of all defined process-relevant features within [the] cycle time”. He adds that there are hundreds of specific part attributes that are measured in this way. They include “important mounting and fixturing points, for instance those for motor, airbags, shock absorbers, seats and exhaust system”. Typically, he continues, “the individual positions of such features” are recognised, but functional characteristics are also taken into account by using several measured features to calculate symmetries, distances, lengths and displacements to assure overall functionality and assembly conformance.
A tier one supplier in Canada is using networked digital 3D scanning of workpieces to enable the inspection of automotive subframes by line side operators. Specifically the company is using a Gocator scanning device from LMI 3D in a robotic inspection station created by systems integrator Bluewrist that also uses several software programs from the latter to create on-screen graphics that can identify trends in workpiece conformity. Those programs include, for instance, Bluewrist’s SPCWorks reporting system to create the reports that can be viewed by an operator and its comXstream data communication platform to enable integration of robot, sensor and programmable logic controller. According to Jason Tsiu, marketing manager for Bluewrist, a key feature of the set-up is that it provides a “real-time trending” capability so that any movement towards out of tolerance manufacturing can be detected before acceptable product quality levels are compromised.
Measuring with no human interventionAutomated communications also provide an important enabling factor. In order to help the entire process run smoothly, an RFID chip on the undercarriage that transports parts on the production line transmits to each in-line station the necessary identifying information to initiate the correct measuring program. Therefore, as soon as the undercarriage is in position, the system already knows what subprogram should be run to control the four measuring robots with no human intervention.Dr Modrich confirms that all “stochastic failures” (production failures due to such factors as broken tools) will be immediately recognised by the in-line measuring system. “By means of statistical process control, drifts in production can be identified and corrected before major impacts occur,” he states. “In addition preventive maintenance measures can be initiated before a line has to be stopped due to a defective production tool. In other words, there will be 100% in-process control allowing immediate correction of manufacturing processes, since there will live data from those processes.”
This approach also provides for the flexibility required to cope with one particular characteristic of a very new plant – that of carrying out volume production of some parts while continually adding further parts to the system’s overall capabilities. “Since this is a commercial vehicle with a lot of different variations, for example, there are already 30 over different side panels, this means many different robot path programs to reach the different measurement point locations will be required,” states Dr Modrich.
As such, Dr Modrich continues, “we recommended to our customer that they build one off-line station which conforms exactly to the physical design of the other five stations. Programs for new vehicle types are prepared in the off-line station and just require a little touch up before they are ready to be used in the production lines. The total time saving for each model is tremendous.” The AIMax sensors themselves provide three measuring principles in a single unit – multi-line triangulation, grayscale image processing and shadow analysis – something that enables them to measure complex geometric characteristics like special boreholes, holes, screw threads, weld nuts, gaps and flush. Moreover, typical measuring times including robot movement are 1.8-3.0 seconds per measuring position.
Volkswagen itself is also satisfied that the mix of state-of-the-art sensor technology and integrated communications is paying off. “This way we know immediately where we need to modify our processes,” confirms Werner Steinert, head of PWQ-3/1 QS-analysis/metrology at the plant. He says that the monitor at each station shows operators very clearly how close specific characteristics are to exceeding tolerance. “We start paying very close attention once tolerance utilisation hits 75%,” he explains.
In fact, engineers from the Quality Assurance department can often identify the cause of tolerance deviations simply by examining photographs taken by the camera on the AIMax sensor. “This makes it easy for us to determine if there is something like glue in the boreholes, which eliminates the need to rework the part later,” says Steinert.
Composites find a cureMeanwhile a Michigan-based Plasan Carbon Composites has exploited a mix of sensor technologies and networked analytical software to help optimise the quality control aspects of an innovative new production process. The company produced carbon-fibre components such as hoods, roofs and side panels using autoclaves that could take up to 90 minutes to ‘cure’ composite parts at the necessary high temperature and pressure. But the company recently implemented a new methodology using first-of-their-kind pressure presses that use proprietary technology to directly heat the tool mould surface for faster heat transfer to the carbon fibre. This is said to have reduced curing times for Class A components to less than 20 minutes.

However, this process introduced a number of new and complex variables, which the company had no means of capturing and logging and which led to initially unacceptable levels of scrap and quality defects. So Plasan looked to implement a software solution that could record and report process parameters for each part going through the presses. The aim was to drive scrap down from around 10% to below 4%, potentially saving millions of dollars of savings annually. The software systems involved were the FactoryTalk Historian Site Edition (SE) and FactoryTalk VantagePoint enterprise manufacturing intelligence software from Rockwell Automation.
Danny McKinnon, controls engineer with Plasan says that the new process is very data-intensive. “What makes our pressure presses so fast is how we control the temperature, vacuum and pressure – that’s the complex part of the process,” he states. “We also record operator information, tool number, press number and anything else that is a part of the process. We’ve found that it’s the small things that cause the most quality issues, things that most would never care to record.”
As such, McKinnon continues, “all parameters are recorded in one second intervals 24/7.” The data is then “broken down” by looking at the sequence number of the press, so that when the press is running a cycle, the sequence number will be between certain numbers, with numbers outside of that range indicating machine idle time. “When running a report with VantagePoint, you pull back data based on frequency in time of the serial number or idle string,” he explains. “Then you can open a report based on the time of the cycle giving you a graphical representation of the cycle.”
The machines themselves and the Historian software use EtherNet/IP as a networking protocol. “To make our Historian implementation successful we had to upgrade our entire plant and machine network infrastructure to be able to connect everything,” McKinnon confirms. “This gives us the ability to look at data from the smallest sensor in real time from anywhere in the world with an internet connection and the correct security protocol. My goal is to make Plasan a ‘smart factory’ – we are about halfway there.”
“The pressure presses were a major challenge and we set out to do something no one else has ever done before,” McKinnon concludes. “But we’ve made them into what we originally envisioned. We have serialised over 196,000 parts just in those presses and we can go back and review all the process data. Now, most of our secondary processes are connected to Historian, helping us reduce scrap in those areas as well.”


