Vision of the future
OEMs' use of optical metrology techniques in fully automated robotic cells has increased significantly in the last couple of years aided by the development of a number of essential technical capabilities

Volkswagen’s latest plant at Wrzesnia in Poland is one site where the use of vision-based inspection systems for quality control has been implemented in some depth. That much is confirmed by Sebastian Reiss, senior application engineer for vision system supplier GOM, which has kitted out the off-line metrology room at the plant with significant amounts of its technology.
Reiss notes that the facility employs three double robot cells, capable of scanning full vehicle bodies using GOM’s ATOS ScanBox Series 8 scanning system; two robotic cells using the company’s ScanBox 6130 optical measuring machines for use on smaller hang-on parts such as doors mounted on rotating inspection tables; and several manually-operated ATOS systems for examining small parts.
Peak application of technologyAll five of the ScanBoxes use the company’s Triple Scan Sensor, which delivers three-dimensional measurement data and analysis for industrial components such as sheet metal parts, tools and dies. The same is true for the manual units.
This level of optical-based inspection, says Reiss, represents the current “peak” of the application of the technology – quite simply, he states, “full acceptance” of optical as opposed to contact techniques. As such, Reiss estimates that around 80% of the inspection routines carried out in the room utilise optical techniques.
“All functional dimensions” of the bodies and parts placed in the cells are inspected by these means, he explains. But the systems have much greater potential and once the plant is fully ramped up the prospect is not just of the fulfilment of an SPC (statistical process control) plan but also the measurement of complete bodies to support comprehensive “process optimisation”.
Nevertheless, according to Dirk Behring, sales director for GOM, this level of exploitation of optical metrology systems is still relatively new and, by implication, indicates the speed with which the automotive industry is now adopting the techniques involved. The use of optical metrology techniques in fully automated robotic cells started with appropriate precision four years ago, says Behring. He adds that this trend has perceptibly accelerated over the last couple of years and, as such, the VW Wrzesnia plant does represent the current state-of-the-art.
Behring says that the increase in application of such systems has been made possible by the continuing development of a number of essential technical capabilities. He identifies two in particular. The first is simply their increasing accuracy in the measurement of sheet metal parts. At Wrzesnia, for instance, they are working to tolerances of “better than 0.15mm”. The second is the sheer increase in the speed with which optical systems can be programmed to measure specific parts compared with their contact counterparts.
On the latter count, Behring says that for a vehicle such as the Crafter (being built at Wrzesnia) programming a contact CMM to carry out a full body-in-white inspection “might easily take a week.” As he explains: “You have to determine all the points to be measured and teach the system to drive the probe to those points.” But with a modern optical system, such as that at Wrzesnia, because of both its non-contact capability and the fact that it contains an “auto-teaching” capability that calculates how the sensor should be positioned, this can be reduced to no more than a day. “It is much faster both in programming and in use,” he states. “It is an automatic process that is user-independent.”
Complete structure for series measurementsThe leading-edge role of the Wrzesnia plant in VW’s use of optical-based inspection techniques is confirmed by Dirk Rieckmann, leader, quality system analysis for VW at the plant. This is the first time the company has effectively built-in this level of application right from the start, he states: “There are optical systems in other plants but only for analysis. Wrzesnia represents the first time a complete structure has been created for series measurements.”
"[A modern optical system] is much faster both in programming and in use [than a contact CMM]. It is an automatic process that is user-independent" - Dirk Behring, GOM
The techniques are, Rieckmann confirms, only used for dimensional measurements” and involve both bought-in parts and sheet metal assemblies up to completed car level. They are, however, not applied in the powertrain area. The main advantage that accrues, he says, is that VW obtains “more complete” measurements that enable an overview of “neighbouring parts and geometries”. At a broader level, though, he points out that a particular characteristic of the Wrzesnia plant is simply the range vehicle variants it produces. In that context the use of optical techniques makes it “easier to check and compare all the different geometries offline.” As such “we can see what is happening in process.” Ultimately, this new level of technology will provide the company with enhanced levels of information that will, in turn, enable faster error correction. It is, he says, quite simply “a step to the future”.
Meanwhile metrology system vendor Hexagon Manufacturing Intelligence has been working with robot supplier Comau for several years now to develop what it describes as “an innovative application to detect the quotas on car bodies and other parts with the aid of robotic technology.” The system involved is based on a photogrammetry sensor applied to a robot that operates directly inside a production line and represents a new development in the application of photogrammetric techniques in industry.
According to Levio Valetti, marketing manager for Hexagon in Italy, the project has produced a system with the potential to produce results much faster than before, with extreme precision during measurement operations within sheet metal and bodywork production.He explains that previously companies could typically perform quality checks and measurements on car bodies, body panels or body parts in sheet metal in one of two ways. The first was by using handheld tools such as caliper gauges or on a much larger scale, measurement tunnels in which vision systems are positioned.
Alternatively, for more precise measurements they could use a horizontal-arm measuring machine – likely two such machines, one on either side of the line, where car bodies are involved – which might employ either a contact or non-contact sensing technique, the latter most likely involving the use of lasers. However, such techniques all suffer from the same problem – their control and measurement phases are too lengthy to keep pace with the line speeds involved in automotive production.
Robotic platform for vision systemAs such, Valetti observes, high-frequency lines as seen in the car industry simply cannot comply with the 30-45 minutes needed for a quality control and measurement routine carried out by a machine with a horizontal arm. So, in order to meet these requirements, Hexagon decided to exploit the potential of robotics and turned to Comau as a partner in the venture. As Valetti points out: “Robots are already used for welding, handling, painting and many other work phases. Why can’t we use them for quality control?”
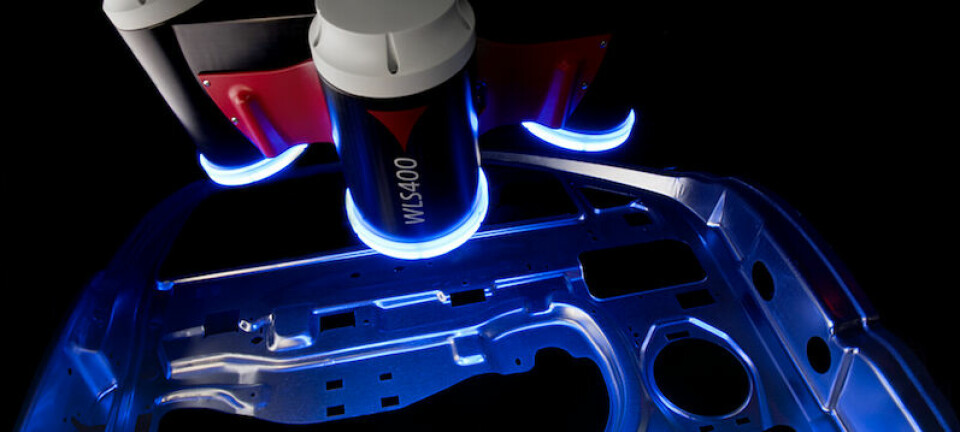
Hexagon and Comau, therefore, worked together to create what they regard as an optimal solution for manufacturers of car panels, steel bodywork, body parts and components given the current state of the relevant technologies. The solution uses a white-light system that, through a sensor, takes 3D photos – where each side is 500mm – with the help of three lenses. The system is able to obtain a very accurate 3D image of objects by projecting a matrix of structured light. The pixelated image is then converted into a cloud of millions of points. With a series of shots, the system is able to reproduce the geometry of the object in an absolutely precise and reliable way in order to compare the surface with the corresponding CAD model to assess variations and approve, or reject, the object after the control phase.
The speed of the robot is critical at this stage. “The machine moves quickly from one point to the other of the trajectory, capturing all the images needed to reconstruct the object. As such, it collects an impressive amount of data in a few moments and the computer receiving the data can exclude redundant or unnecessary images and can reconstruct the piece accurately and quickly,” says Valetti. The system, he further explains, is able to verify surface shape and dimension, geometrical elements and tolerances, though surface finish verification is not a feature.
"The essential features to be verified in-line in a car body can be measured in less than two minutes, which is in compliance with standard cycle times of assembly lines" - Levio Valetti, Hexagon Manufacturing Intelligence
For each measurement cycle, says Valetti, “we recalibrate the sensor/robot system with reference devices that have been previously placed in the measurement station and combined with others we positioned on the car body. In this way, the system adapts and resets based on each incoming body, avoiding the risk of an inaccurate image and of a consequent inaccurate measurement.” He adds that the exposure time for the camera system is just a hundredth of a second, which he says is just a tenth of that of other currently commercially available systems. “This avoids any risk of blurring, while generating very high quality point clouds,” he states confidently.
Valetti says the essential point about the use of robotics is that it facilitates the transport of the sensor to positions that were previously almost impossible to achieve. By themselves, he concedes, robots cannot ensure sufficient precision. “The accuracy requirements for car body verifications are much higher than the positioning capability of standard robots,” he states. “Therefore the main technological development in this instance resides in the ability of the system to constantly recalibrate the overall sensor-robot-reference fixturing to reach the proper system accuracy.”
Something that is definitely not required is any sort of customised robot. “A standard articulated robot can be used for this application, obviously according with payload and reach needed in the line,” he confirms. Meanwhile Valetti also stresses that the system satisfies the basic criterion of being able to keep pace with today’s industry line speeds. “Cycle times are a function of the number of features to be verified,” he says. “The essential features to be verified in-line in a car body can be measured in less than two minutes, which is in compliance with standard cycle times of assembly lines.”

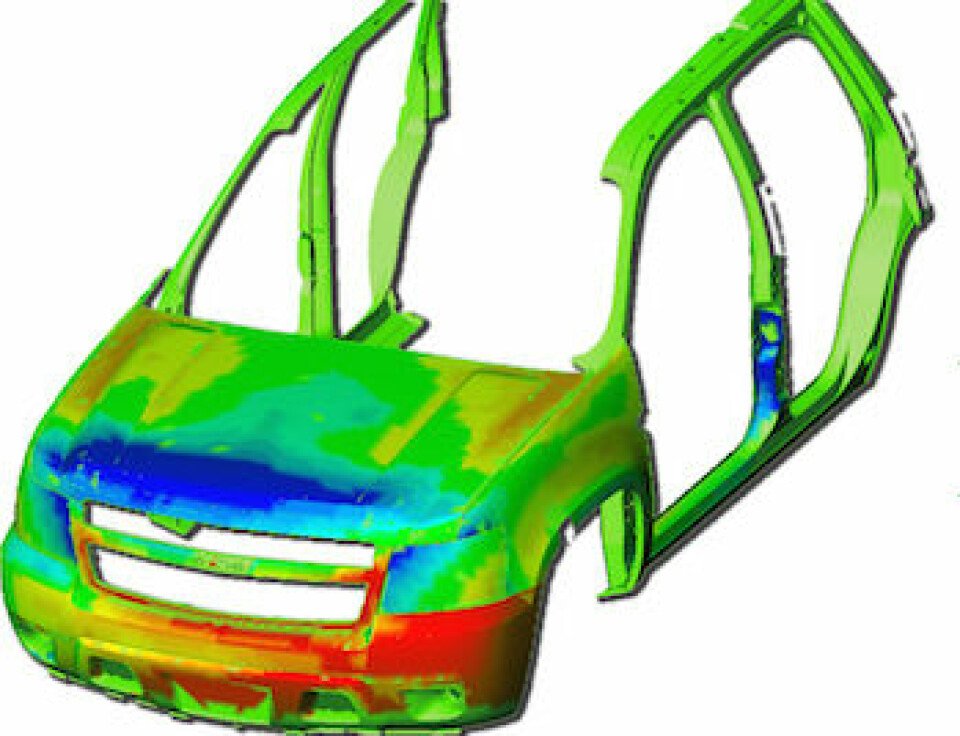
Real-time assessmentMoreover, continues Valetti, “this solution has also solved the problem of making the information it generates available for immediate consultation.” He explains that it does so by providing not just an accurate reconstruction of the measured object, but also a colour map that determines the tolerances and possible areas of non-conformance. This enables the manufacturer to be made aware very quickly of any risk and to respond accordingly. He further adds that a patent-pending capability makes it possible to view a video clip that shows the body as in a time lap and allows the operator to assess the assembly of pieces during the production and make quick decisions as needed. As such, he states, “we have basically enabled real-time assessment.”
Furthermore, the system is now being put to real use in the automotive industry. “The system is in operation at two major car manufacturers in Europe and in the final installation stage in the US,” Valetti confirms. “Some tier one suppliers are also involved.” He says that it has replaced touch probing and some earlier laser scan technologies and can deal with body-in-white, complete cars and sub-assemblies. One carmaker known to be involved in this initial implementation work is Fiat Group. So far, detailed benchmarking data on the system’s effectiveness is not available, though Valetti does indicate that relevant work is underway.
Valetti is also keen to stress that the system is “totally transparent” to the automation of the assembly line and that there is a “direct interaction between the control of the robot and the measurement system” with no integration issues to be resolved. This is facilitated by the system’s use of the Ethernet-based Powerlink communications protocol, which allows the motion and safety data to be transmitted on a single bus.
Nevertheless, Valetti confirms, further development work is continuing to improve the system reliability, accuracy and reporting functions: “As this technology improves and reaches full functionality there are no geographical limitations, while applications can be extended to any free-form component of medium-to-large size where accurate and fast process control is needed.”


