CT scrutiny
In aiming for quality targets, castings supplier Grainger & Worrall regards this technology as a game-changer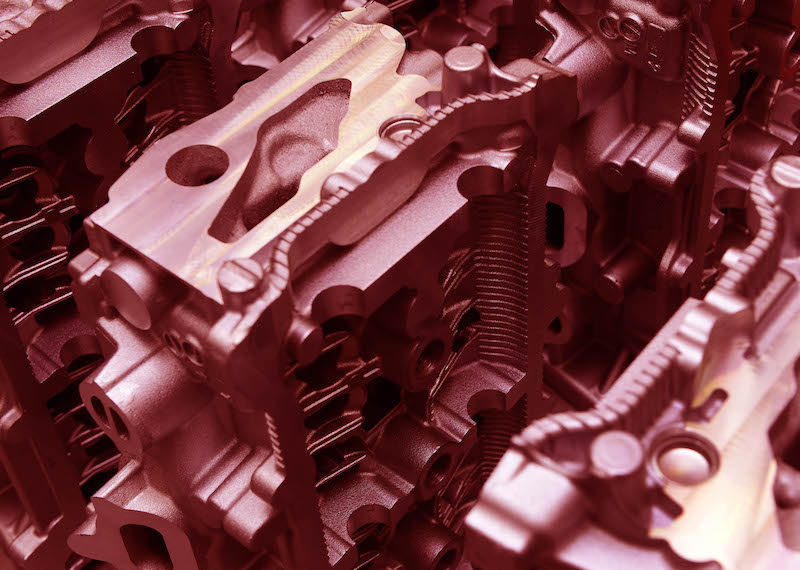
The time has long gone when automotive suppliers – certainly those at tier-one level – did nothing but supply parts to order. Now they must also frequently act as partners in component design and development, responding to orders almost instantly in a context where quality is simply taken as read.
That pithy summary of what is required to survive in this business area today is provided by someone who should know: Edward Grainger, director of UK-based castings supplier Grainger & Worrall. The privately owned company employs around 600 people in the development and production of castings for use in engine, transmission and structural applications.
Grainger concedes that the company's business culture might be slightly “conservative” but its attitude to the use of technology is not. This is reflected in numerous ways in its design and manufacturing operations. For instance, not only are there three different computer-aided design (CAD) systems – from Dassault Systemes, PTC and Siemens – but also ultrasound, X-ray and computer tomography (CT) hardware.
CT has been used by Grainger & Worrall for the last ten years. It was introduced because the company found that the existing combination of ultrasound and X-ray techniques could not satisfy quality control and product reliability targets. Grainger explains that the tiniest of imperfections in a casting can sometimes have the most deleterious of consequences; when the company became aware of a means of detecting them more accurately, failure to implement the relevant technology was unthinkable. “It was not a risk we were prepared to take,” he says.
No more destructive testing
At a more pragmatic level, this technology has enabled the company to reduce drastically the need to test expensive castings by destructive methods. It has, Grainger says, effectively abolished any need to destroy parts in order to check them for imperfections or dimensional accuracy. The only occasions when destructive testing is now necessary are “when we have to get inside the part in order to carry out mechanical performance testing to determine such factors as tensile strength or residual stress in a particular area". He estimates that CT saves the need to cut up perhaps two to three castings in each one of the prototyping projects the company carries out, avoiding the destruction of around 2,000 otherwise usable castings each year.
Moreover, as Grainger explains, quite apart from the sheer waste involved in being unable to sell an expensively produced casting if it has been destroyed, “cutting up parts” is not necessarily a reliable means of quality control. Given that the underlying objective is to ensure that the production process can actually produce parts that conform to specification on a consistent basis then a selective procedure is always questionable. “At what point do you stop cutting up parts and decide that the process is OK?” asks Grainger.
The fundamental capability that CT brings to the company is, he says, that of being able to pinpoint precisely in three dimensions the location inside a casting of a defect as small as a bubble or grain of sand. X-rays may be able to detect such imperfections but cannot determine exactly where they are, because this method examines the whole volume of a casting simultaneously. “They cannot provide an absolute,” Grainger states, adding that the interpretation of X-rays therefore requires suitably experienced staff.
CT, in contrast, examines an object in a series of sequential 'slices', which means that not only the size and nature of an imperfection can be identified but also its location. Though it does not remove the need for skilled interpretation, the technology is more objective. That objectivity is also manifested in another capability it provides: precise metrology. “It can measure a part exactly,” explains Grainger. This is obviously a useful attribute when the parts involved go from a molten to a solid state during manufacture.
CT: An integral part of the inspection portfolioGrainger & Worrall made an initial investment of £350,000 ($497,000) in its first machine, an outlay repeated three years later when a second identical machine was added. Investment in this technology over the last decade has totalled around £750,000.
Utilisation is intensive. The two machines are operated on a 24-hour basis, both as quality control and development support tools. On the former count, Grainger says that for a customer requiring a small batch of engines with extreme reliability requirements (for instance, a Formula One team) the use of CT as a 100% inspection technique would be a “no brainer”. The cost-benefit ratio would simply be overwhelming and use of the machines will accordingly be a contractual requirement.
On the latter count, Grainger says that machine utilisation can often be more ad hoc. Development engineers, he explains, often take a part to one of the CT machines to see if there might be a time slot to check a detail that has been identified as a potential problem by X-rays or conventional coordinate measurement. Hence, CT is integral to the company's portfolio of inspection and analysis techniques rather than being an isolated procedure.
An intensive CT analysis routine typically involves examining a part in several hundred 'slices', each maybe 1.0mm in thickness though a range of 0.75-2.00mm is possible. Grainger says that the procedure then probably takes one minute per 'slice', so a workpiece that is 300mm in thickness would spend around five hours in a CT machine. But in such an instance, the procedure would very likely be carried out on an unattended overnight basis.
The output from that process would, Grainger says, comprise two main elements. The first would be a tomograph report that precisely identifies the nature and location of any imperfections down to a size of just 0.2mm in width. The second would be an accurate 3D representation of the part's external and internal geometry that can be compared with the relevant 3D CAD reference data to ensure that the manufactured part conforms to the design intent. The significance is that engine castings contain internal channels which simply cannot be checked otherwise by an external, non-destructive method.
In turn, adds Grainger, that capability not only ensures the integrity of the initial casting process but also that subsequent machining will not compromise quality. The precise location of a drilled hole, for example, could be adjusted slightly to ensure that it does not aggravate what might otherwise be an acceptable, slight imperfection.
Moreover, the output from the process can be used as the basis for interaction and discussion between the company and a client on a remote basis. Grainger says clients can easily log in remotely to the company's own internal network or be sent a file of the particular area of interest. The ease with which such interactions can be carried out, as the result of developments in desktop computing and wide area networking, is one of the key ways in which the utility of the technology has increased since it was first installed, according to Grainger.
Humans check the ‘slices’The two XYLON CT Compact units sit next to each other, to one side of a large room in the main factory complex. They are under the immediate supervision of metrology manager Gary Breech, who says that they can deal with workpieces up to maximum dimensions of 500mm in diameter and 750mm in height. In practice, though, the capabilities of the machines mean that the largest sizes are for aluminium parts; iron parts tend to be limited to maximum widths of 100mm. After workpieces are loaded manually onto the table inside each machine, and the door is shut, the operation is then completely automated.
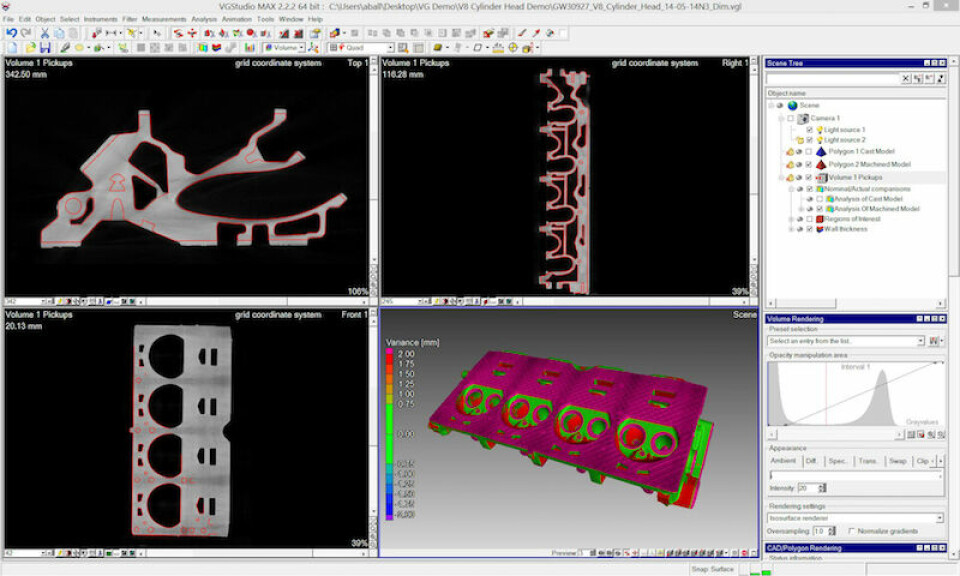
But what happens afterwards requires skilled human involvement. Breech explains that the first step in the subsequent analysis process is a painstaking slice-by-slice visual inspection of CT data on a computer screen by one of the half-dozen individuals who have been trained to identify the tiny signs of imperfections. He says that sheer visual acuity is their crucial capability and that the engineering knowledge can be grafted on to that; one worker was previously a typographer in the printing industry. An operator can check about a hundred 'slices' every 15 minutes.
Nevertheless, further processing of raw CT data does take place. Here, Breech says that a particularly important tool is a software system called Volume Graphics that transforms the initially "flat” slices generated by the CT system into much richer 3D imagery. The purpose of this is to support its use for metrology applications, achieved through direct comparison of the CT data with a reference CAD model of the part involved. Still, Breech says, the operator’s skill and experience are the key factors in enabling the data to be exploited to useful purpose. “You need to know what you are looking for and how to report it,” he explains. Although there is software to perform this task, the company does not yet regard it as adequate for its demands.
Unsurprisingly, therefore, Edward Grainger takes the view that the company's use of CT has been a “game changer”. But he is careful to stress that it has been so only in the context of the increased knowledge and competence it has helped to create among the workforce; it is not in any sense a technical quick fix. The key thing is “the depth of understanding of castings” that the company now possesses. As he puts it: “If we see something that needs investigating we don't stand around debating it, we say 'come on, let's check it'.”

Formula for successCastings supplier Grainger & Worrall is based near Bridgnorth, just west of one of the UK's main automotive manufacturing hubs, Birmingham. The bulk of the workforce, comprising 500 staff, is based in a set of brick buildings on an industrial estate on the hillside above the town. About 100 out of that total are what the managing director, Edward Grainger, would term “engineering” personnel, whether apprentices or postgraduates. “Skilled operatives” such as pattern makers account for a similar number. A further 100 staff are employed at a site a few miles from Bridgnorth, a machining and assembly operation at Telford.
The Bridgnorth site is the location not just for casting operations but also supporting design and development activities and some machining, as well as sales and administration. Altogether, they constitute a business that now has a turnover of roughly £46m a year derived from serving three distinct, if related, markets. According to Grainger, these are: developing technology for the motorsport sector; providing prototyping services mainly (though not entirely) for the automotive sector; and producing low volumes (between 2,000-5,000 parts per year in each case) for high-end carmakers such as Bentley, McLaren, Aston Martin, Porsche and Bugatti.
Categorising the sources of the company's income, Grainger says it is split roughly 50-50 between “selling castings” and other “value-added” activities, especially prototyping operations. Grainger says that the company carries out around 600 such “new product projects” every year. The formula certainly seems successful. It enabled the company to weather the downturn that hit the global economy in 2008 when turnover dropped to just £14m, and since recover by maintaining a steady 10-15% annual growth, during which time the workforce more than doubled. Grainger adds that not having to worry about generating returns for external shareholders is a contributing factor. “We can take a longer term view of things,” he observes.
